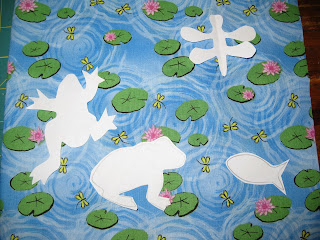
First I had to decide what fabric to use keeping in mind the picture it would depict....I then started laying out my ideas for patterns. I recommend making your items larger for small hands, plus when you start stitching it helps.
Each page is 9 inches by 18 inches. Keep in mind how you want to arrange the pictures. Sometimes you will use the 18 inches in full for something. I needed it for the under the sea scene and the mailbox page, and the garden page. You will see what I mean in the next pictures. Once I cut out the images and pinned them where I wanted them on the cloth, I began to hand stitch each item. I had thought of using the sewing machine and perhaps will another time. I actually enjoyed doing them by hand. I used a thin batting between the pages. I cut this smaller so that when I used the sewing machine to go around the page for the final finishing off process, it would not be too thick. It worked out great. The batting gave some body to the fabric. Some of the fabric was thin and others were a little thicker. I used some denim on one section.
On every page I tried to have a way to store the decorations. In the sea scene there is a sea chest, including a little fabric pirate map. All of the animals can go back into the chest for storage. The next page is a weaving page, and then the flowers which can be unbuttoned and stored in the flower pot. Next is the garden, with little pockets to plant and store the carrots and beets. The pig and chicken are finger puppets. The mailbox actually opens and will hold any little notes that are written. Note the pocket that holds the paper pad and the pen. I tucked a red heart in the mailbox! A snowman to dress up. You cannot see it, but there is a clear plastic square to hold all of his clothes. And last comes a truck that you can take the wheels off and some cloth cut to look like dirt to load in the back. The little door opens and closes too. After sewing this all together, I probably could have cut the truck a little smaller.
After tucking in two handles, made from sturdy ribbon to tote this little book and a closure to hold it together, I stitches around the entire page and then trimmed with pinking shears. You then find the center of all the layers and stitch down the middle for the finishing touch. It will alter the size a tad as does some of the bulk, stitching, etc. All in all I have enjoyed making this project and have some other ideas in mind. Will share those when I do them. This project is not hard, it just requires a lot of time. Of course I was making two and not one, so that accounts for more time involved! For any one interested, I would recommend this. It is something that you cannot buy and I hope it will bring some joy and fun for Levi and Mason. It was made with lots of love!


Both boys love them...Levi's favorite page is probably the mailbox and Mason loves the finger puppets (pig and chick..he says "Hey Mommy" when he puts them on!).
ReplyDelete